When it comes to sneakers, customization is key. Sneakerheads are always finding new and creative ways to make their sneakers unique, from adding new laces to painting the soles. However, one customization method that often goes overlooked is removing glued insoles. This simple modification can completely change the look of your sneakers, and the best part is that anyone can do it themselves. In this comprehensive guide, we will show you step by step how to remove glued insoles and provide you with some tips on how to customize your sneakers using this method. So let’s dive in!
Understanding the Importance of Shoe Insoles

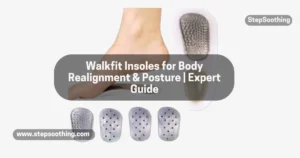
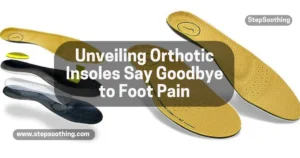
Before we delve into the process of removing glued insoles, let’s first understand the significance of shoe insoles. Shoe insoles play a crucial role in providing comfort, support, and improved fit. They are made of various materials such as cork, cloth, felt, foam, leather, rubber, and vinyl. The primary function of insoles is to absorb sweat and moisture from the foot, maintain hygiene, and protect the feet against external injuries by providing shock absorption properties.
Moreover, athletes extensively use shoe insoles for protection during training sessions. Over time, as the shoe sole wears off due to prolonged use, it becomes necessary to replace the insoles for optimal comfort and performance.
Things You’ll Need:
- Hairdryer
- Brush
- Water
- Towel
- Craft Knife
Step-by-Step Guide: Removing Glued Insoles
Now, let’s get into the nitty-gritty of how to remove glued insoles from your sneakers. Follow these steps carefully for a successful removal process:
Step 1: Remove the Laces
The first step is to remove the laces from your shoes. By doing so, you’ll have easier access to the insoles, enabling a smoother removal process.
Step 2: Use a Hairdryer
Next, grab a hairdryer and put it on the highest heat setting. Hold the hairdryer approximately six inches away from the glued insole and heat the glue until it becomes soft and pliable. This step will make the next step much simpler.
Step 3: Apply Heat in an Oven (if necessary)
If the glued insole remains attached to the shoe despite using the hairdryer, you can proceed to this optional step. Place the shoe in an oven on the lowest heat setting. The heat will further soften the glue, making it easier to remove.
Step 4: Removing the Insole
Now, it’s time to remove the insole from the shoe. Place your fingers underneath the glued insole and apply upward pressure to lift it. Repeat this process until the entire glued insole has been successfully removed from your shoe. This step ensures a thorough removal of the glued insole.
Step 5: Seek Professional Assistance (if needed)
In some cases, you may find it challenging to remove the glued insole by yourself. If that’s the case, don’t hesitate to seek professional help. Professionals have the necessary tools and experience to handle the situation quickly and efficiently.
Step 6: Clean the Insoles
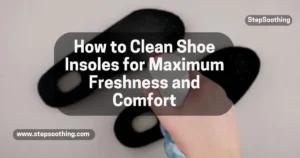
After removing the glued insoles, it’s important to clean them for hygiene purposes. Use a brush and water to thoroughly clean the insoles. Dab them with a towel to remove any excess water, dirt, dust, or residue.
Step 7: Completely Dry the Insoles
Ensure that the insoles are completely dry before reinserting them back into your shoes. If you have a hairdryer, you can use it to expedite the drying process. Once the insoles are thoroughly dried out, place them back into your shoes where they belong.
Step 8: Add Your Insoles
The final step is to add your desired insoles. You can use a craft knife to cut out the shape of your shoes on a new replacement insole. Then, simply glue the new insoles into place or try out some neoprene insoles for added comfort and customization. Congratulations! You have successfully removed glued insoles from your shoes.
Tips and Warnings for Removing Glued Insoles
To ensure a smooth removal process and prevent any unintended damage, here are some useful tips and warnings:
Tips
- If the adhesive is stubborn, use a hairdryer to soften it before attempting to peel it off.
- If there is residual adhesive remaining on the insole or shoe, rubbing alcohol or a petroleum-based product like Vaseline can help loosen it up.
- Exercise caution and avoid using sharp objects to pry off the adhesive, as this could damage the insole or shoe.
Warnings
- Do not apply excessive force when removing the adhesive, as it may cause damage to the insole or shoe.
- Avoid soaking the insoles in any liquid, as this could lead to damage.
- Never attempt to heat the adhesive with a hairdryer or other heating devices, as it may pose a fire hazard.
- Be mindful when removing glued insoles to avoid damaging your shoes or insoles. If you encounter difficulties, these tips should provide assistance. However, always prioritize caution and safety.
The Benefits of Removing Glued Insoles
Removing glued insoles offers several benefits. If an accident occurs and the glued insoles become undone, it is often easier to remove them rather than attempting to fix the problem. Unlike some foot alignment issues such as bunions, glued insoles are challenging to repair. Trying to fix them without professional expertise can potentially worsen the problem and cause damage to the shoes, rendering them unusable.
Promptly removing glued insoles allows you to have more time wearing those shoes instead of risking further damage in the future. It also provides the opportunity for the affected area to heal before resuming regular usage.
Can All Converse Insoles Be Removed?
In general, Converse insoles can be removed. However, the ease of removal depends on the adhesive used for the glue-in insoles. While most users find it relatively simple to remove them, certain individuals may encounter difficulties based on the type of adhesive they used. For those facing challenges, seeking assistance from Converse customer service is the best course of action. They can provide the necessary guidance and support for removing glued insoles from Converse shoes.
Is It Okay to Wear Shoes Without Insoles?
Yes, it is generally safe to wear shoes without insoles, especially when they are specifically designed for a particular size or width. For example, individuals with wide feet might need to purchase shoes specifically made for wide feet, which often have wider soles and more space in the toe box. However, there are exceptions to this rule.
Individuals with foot injuries such as plantar fasciitis may require insoles to support their feet, reduce pain, and alleviate inflammation. If you do not have any foot injuries or issues, wearing shoes without insoles is acceptable. Nonetheless, if you prefer the added comfort of insoles, you can always purchase and insert them into your shoes.
Conclusion
With this comprehensive guide on removing glued insoles, you now have the knowledge and tools to give your sneakers a personalized touch. Remember, the process consists of several steps, including removing laces, using a hairdryer, potentially applying oven heat, and gently removing the insole. Take precautionary measures to avoid damage and prioritize safety throughout the process.
Now that you’re equipped with this valuable information, you can confidently embark on your journey to create custom sneakers with unique insoles. Get creative, experiment with different materials, and enjoy the process of transforming your shoes into one-of-a-kind masterpieces. Good luck and happy sneaker customization!
Explore tips on refreshing insoles, from tackling odor to cleaning sandal insoles. Dive into our guide for leather shoe insoles.
Updated Information what Technology are used now a Days in Insoles
1. New Technology in Insoles:
- Eco-Friendly Materials: Many insoles today are made with eco-friendly materials like biodegradable foam or natural rubber, which offer both comfort and sustainability. This could be a great addition to your article, highlighting eco-conscious customization options.
- 3D Printed Insoles: With the rise of 3D printing technology, custom insoles are becoming more accessible. You could include how this innovative approach allows for perfectly tailored insoles that can be swapped in and out easily, giving readers more options for customization.
2. Adhesive Types in Sneakers:
- Not all insoles use the same type of adhesive. Some may use stronger adhesives for more permanent attachment, while others may use pressure-sensitive adhesives that can be more easily removed. Highlighting this difference can provide clarity for readers who might struggle with more stubborn adhesives.
3. Increased Demand for Custom Insoles:
- Custom insoles are becoming a growing trend, particularly for individuals with foot pain or specific support needs (e.g., flat feet, high arches). Providing information on how people are customizing insoles not only for comfort but also for style can give readers additional ideas.
4. Preventing Foot Odor:
- Adding a tip on using activated charcoal insoles or antimicrobial sprays before replacing the insoles can help reduce odors, especially in sneakers that are worn frequently.
5. Troubleshooting Tips:
- For shoes with stubborn glue that resists removal, incorporating modern tools like a heat gun or a commercial adhesive remover would offer readers alternatives beyond a basic hairdryer and oven.
People Also Asked
Do you remove Insoles when using Orthotics?
If you have been prescribed orthotics, your doctor may have provided instructions on when and how to remove the insoles from your shoes. Most individuals with orthotics remove the insoles when they are not wearing their orthotics. This allows the feet to breathe and helps to maintain the orthotics’ condition. However, if you have glued-in orthotics, it is typically recommended to leave the insoles in your shoes at all times. Glued-in orthotics offer greater support and stability compared to removable insoles.
Does taking the sole out of a Shoe make it bigger?
Yes, removing the glued insole can make your shoes slightly bigger if you find them too tight. This option allows you to increase the space inside the shoe, providing a more comfortable fit. By removing the glued insole, you can make incremental adjustments to the shoe’s overall size and enjoy a better wear experience.
Can I reuse glued insoles after removing them?
Generally, it’s difficult to reuse glued insoles as the adhesive is often too weakened or removed during the process. However, you can reattach them with fresh adhesive if they are in good condition.
Will removing the glued insole void my shoe warranty?
Some shoe warranties may be voided if modifications, including insole removal, are made. It’s important to check the manufacturer’s warranty policy before attempting to remove glued insoles.
How do I know if my insoles are glued or removable?
If you can see the insole is securely attached with no visible seams or edges to pull it out, it is likely glued in. You can also check with the manufacturer or try gently pulling the edge of the insole to see if it lifts.
Can removing the insole affect the shoe’s fit?
Yes, removing the insole may slightly alter the fit of the shoe, especially in shoes that were designed to have a specific insole thickness for comfort or support. You may need to replace it with a thinner or custom insole for a better fit.
Are there any risks to removing glued insoles?
If not done properly, removing glued insoles can damage the shoe’s interior or tear the fabric. Always use the appropriate tools (like a hairdryer) to soften the glue and avoid using excessive force.


